Showing posts with label Barry M. Show all posts
Monday, 23 June 2014
Manic.Monday: A brush with water decals
For being a self confessed polishaholic, I have experimented surprisingly little with nail art and the furthest I've gone into the realm of different nail art techniques is to apply gemstones (surprise, surprise...) or using self adhesive nail stickers so when I got a selection of gorgeous water decals* from Born Pretty the time had come for me to go forth and explore the wonderful world of nail art. I wanted to do something summery with fresh contrasts so as a base for the look I used Barry M nail paint (£2.99) in Matte White. Barry M is one of my go to brands and I have to say that I've got more of their nail polishes than I can count. The consistency of this particular shade is ever so slightly different than the others in that it's a tiny bit more runny which means that you only need the smallest of drops of product for it to cover your nail, which would also help to minimise any mess of excess polish on cuticles etc. Even though the formula is a bit more difficult to work with, the pigmentation is fairly strong for a light shade and far from sheer, although I would definitely recommend that you apply two coats for a nice opaque solid color, which isn't really an effort since each coat will dry quite quickly. Matte White is a lovely crisp, clean and fresh look for summer, perfect for enhancing a tan and despite being a matte finish you still get a lovely and natural shine that lasts for about 3-4 days on its own before it starts to chip.
Having let the white base dry properly I moved on to try my luck with the beautiful water decals*. I absolutely loved the abstract brushstrokes in azure blue with gold specks and I was very excited to see how they actually turned out on the nail, and if they were easy to work with. When it comes to water decals, the clue is in the name and you basically need to plunge them into water to get them pliable enough for sticking them onto the nail. According to the instructions, you should peel the film off the decal
before you dip it into water, but I found it impossible to take the
film off while dry, so I would recommend that you simply cut out the
shape of the decal then put it in the water for up to a minute and when you
take it out, it'll already have started to come away from the paper
making it very easy to transfer onto the nail using a pair of tweezers. After you've placed the
decal on your nail, you soak up any excess water with a cotton pad or
some tissue - blast the nail under a blow dryer for about 20 secs so that the decal is
completely soft and dry, and then finish off by sealing it in on the nail with a top coat. Once the decal has set on the nail, it'll
last for about 4-5 days and it's also surprisingly easy to remove with a
good dip and twist nail polish remover, taking no more than a few
seconds to remove.
I do like the effect and having got the hang of the
technique now, I think that with more practice and experimenting with
different colors and also other accents, you can create some really wonderful
look, however I also have to say that it is quite fiddly and a fair
amount of work just to get a decal on your nail - approximately 5-6 mins
for each nail that you decide to decorate. As much as I love different
nail looks, personally I prefer a simple self adhesive sticker to the
effort you have to put in with a water decal, but if you have some time
to spare you should definitely give it a go and see how you get on with
it and Born Pretty has a great selection of all kinds of nail art for next to nothing and they always have great offers on, including free worldwide delivery. To make it even more difficult to resist, you get an additional 10% off on whatever you treat yourself to when you enter the discount code CANW10, so head over to Born Pretty and embrace your creative side for some unique, eye catching nails.
Monday, 28 April 2014
Manic.Monday: Purple magnetism with Barry M
You may remember that just before Easter I did a post on the color purple (you can read my Purple edition here), and when I was selecting the products that I wanted to include I rediscovered an old favorite that has been pushed further and further back in my very over-crowded drawer of nail polishes and I quickly decided that I would show it some well deserved love. When Barry M launched their range of magnetic nail polishes a few years ago, I became more than a little obsessed with them. The idea behind them is that since the formula contains a very fine powder that reacts to a magnet, you can create a specific pattern. They come in a variety of colors (black, red, blue, green, purple and different metallics) and magnetic patterns (chevron, straight line, diagonal line, waves, Union Jack/star pattern) and since I couldn't decide which one I liked the most, I ended up buying all of them - after all, why compromise? I must admit though that I have used some much more than others and the Barry M Magnetic Nail Polish (£4.99) in Violet is definitely at the top of the list. Despite containing a microscopic powder, the formula has just the right consistency - not too thick and not too thin, and is as far as I can tell exactly the same as with the ordinary Barry M nail polishes, and the same can be said about the brush which is of average width but still easily gives an even and full coverage.
To create the magnetic look you definitely need at least two coats, and you need to shake the bottle properly before you apply each coat, to make sure that you get a good distribution of powder to react with the magnet, which you don't use until the second coat. After you've applied one coat on each hand, the result is best if you work on one finger at a time and as soon as you've applied the second coat on a nail hold the magnetic top over the nail for a few seconds. You can see a pattern appear almost immediately, so you don't actually need to hold the magnet over the polish long at all, although I usually count to 10 before I remove it. In my experience most of these magnetic effects turn out really beautiful and the only one that I can't quite get to turn out very well is the star effect - since my nails are quite narrow, there simply isn't enough surface for the pattern. The Violet shade is a beautiful deep aubergine color with a touch of silver sparkle and although the contrast created by the magnet is gorgeous, the shade is lovely enough to wear without using the magnet. I think the magnetic effects should be shown off with a high shine top coat for a brilliant and almost glass like look which is really stunning so I always finish with a top coat, although it might be interesting to experiment with a matte finish too. On me the nail polish will last about 3 days before it starts to chip, and unlike a lot of other glitters and effects, it's just as easy to remove as an ordinary polish. I know this isn't the latest among nail effects, however I still love the look and I always get compliments for them, regardless of which color or pattern I go for and the great thing is that you can of course use any magnetic pattern with any of the colors, so you can be as creative as you want - mixing colors and perhaps even patterns.
Monday, 18 November 2013
Manic.Monday: Barry M Limited X-mas Edition - Tinseltown
In my latest gianormous autumn haul from Boots there were of course a few nail polishes. I was doing so well, not having picked up a single nail polish until the magpie in me caught eye of something - a wonderfully glittery, glitzy, shimmery limited edition shade from Barry M, and then it was just downhill from there. Ah well, it happens to the best of us... The polish that was the ruin of me was the shade Tinseltown (£3.99) which contains a firework of colors; glorious Christmas red, bright vibrant blue, dazzling cerise and there are even some speckles of emerald green.
I think it's well known by now that I'm a big fan of Barry M nail polishes - the formula is great, the range of shades excellent, wear is super and all of this between £3.99 - 5.99! Tinseltown is a clear base with these colorful little particles fairly densely scattered through it, and the style reminds me a lot about the Nails Inc Feathers formula. The thing about polishes of this kind is that the look is random and every application will give a slightly different result. That's absolutely fine, but even though the spread of the glitter on the nail is uneven I still want the glitter over the entire nail, and not just on the side or the tip etc and for me this is the biggest challenge with this polish. The brush is of the same width as the standard polishes which means that it doesn't spread the glitter very well and you have to carefully move the glitters around to space them more evenly.
I've experimented with using Tinseltown on it's own and also as a top coat to different base shades - red, white and green, after all it is a Christmas edition nail polish. Since the polish is fairly rich with the particles you do get quite a lot on your nail in one coat as you can see in the photo below and since it dries very quickly you can easily apply as many coats as you wish and then add a top coat. To get a complete and super dense coverage of the glitter on your nail using no other shade, I think you would need at least 3 or 4 coats which might make it more sensitive to chipping. I usually find that when I wear more than 3 coats it only takes a small dent or pull, and all of the polish comes off in one big flake.
I'm sad to say that I'm not very impressed with the results. The formula is good, it's easy-ish to apply but you really have to take care with the coverage, it dries quickly and the colors are beautiful, but I just don't like the look. It could be that I've combined it with the wrong base shades, but if it's a Christmas edition, it's not unreasonable to expect it to work with traditional Christmas colors too, or maybe that's just me... I'm also not sure about using this on it's own since it seems like there are a lot of black particles in the polish too - more than I expected, which darken the look quite a lot. Who would have thought that I would be disappointed with a Barry M nail polish, but I'll keep on trying with different base shades - maybe a pink or blue, until I find something that works, and if you have any great ideas, please let me know what color you would use as a base shade for this glitter coat.
I think it's well known by now that I'm a big fan of Barry M nail polishes - the formula is great, the range of shades excellent, wear is super and all of this between £3.99 - 5.99! Tinseltown is a clear base with these colorful little particles fairly densely scattered through it, and the style reminds me a lot about the Nails Inc Feathers formula. The thing about polishes of this kind is that the look is random and every application will give a slightly different result. That's absolutely fine, but even though the spread of the glitter on the nail is uneven I still want the glitter over the entire nail, and not just on the side or the tip etc and for me this is the biggest challenge with this polish. The brush is of the same width as the standard polishes which means that it doesn't spread the glitter very well and you have to carefully move the glitters around to space them more evenly.
I've experimented with using Tinseltown on it's own and also as a top coat to different base shades - red, white and green, after all it is a Christmas edition nail polish. Since the polish is fairly rich with the particles you do get quite a lot on your nail in one coat as you can see in the photo below and since it dries very quickly you can easily apply as many coats as you wish and then add a top coat. To get a complete and super dense coverage of the glitter on your nail using no other shade, I think you would need at least 3 or 4 coats which might make it more sensitive to chipping. I usually find that when I wear more than 3 coats it only takes a small dent or pull, and all of the polish comes off in one big flake.
From left to right:
One coat
Two coats (and a half to adjust the spread of the glitter)
One coat on red base coat
One coat on white base coat
One coat on green base coat
I'm sad to say that I'm not very impressed with the results. The formula is good, it's easy-ish to apply but you really have to take care with the coverage, it dries quickly and the colors are beautiful, but I just don't like the look. It could be that I've combined it with the wrong base shades, but if it's a Christmas edition, it's not unreasonable to expect it to work with traditional Christmas colors too, or maybe that's just me... I'm also not sure about using this on it's own since it seems like there are a lot of black particles in the polish too - more than I expected, which darken the look quite a lot. Who would have thought that I would be disappointed with a Barry M nail polish, but I'll keep on trying with different base shades - maybe a pink or blue, until I find something that works, and if you have any great ideas, please let me know what color you would use as a base shade for this glitter coat.
Saturday, 9 November 2013
Autumn haul from Boots
You know how a picture says a thousand words? Guess what mine says - yep, HAUL!!! It's always nice to go browsing in the beauty stores, but as I am a very organised person I usually come with a shopping list that I at least pretend to try and stick to. I always have the most fun when I haven't planned on buying anything at all and I have a completely open mind to what might come my shopping basket way. As you can see my mind must have been wide open on this occasion, since I managed to pickup a LOT of stuff.
Let's start with the eye products! For me Bourjois has been on a real winning streak this year and produced some excellent products and as fan of the Maybelline Colour Tattoos I obviously wanted to try the Bourjois' version, Color Edition 24h Eyeshadow. Since I'm trying a few new things with my makeup this season I didn't want to be predictable and go for the usual taupes and bronzes and instead went for Khaki Cheri, which is a gorgeous warm golden bronzed green. I haven't even tried it yet, but I already love it and really hope that the wear is as great as what you get from Maybelline. I also picked up a few classical Bourjois Little Round Pot Eyeshadow to use for a quick and simple day wear, all across the lid with eyeliner. I chose the shades 16 Orange Epice, a warm golden cinnamon and 54 Marron Glace a genuine chocolate brown with some faint shimmer.
This year I'm really trying to be more seasonal with the colors I use in my makeup, introducing some berry shades and purples. The L'Oréal Colour Riche Quad is perfect for that with its four perfectly matched, tonal mauves which I think will work well with blue eyes. I have tried a few other palettes this year and while I've liked most of them, there's almost always been pigmentation issues with the lighter shades, so fingers crossed that all four will work for me.
Still on the purple theme - I also got the Rimmel Scandaleyes Shadow Stick in Paranoid Purple. I've only tried this on very quickly and a more detailed review will follow later on, but it feels very soft and should glide on without too much tear, and the purple shade certainly is a bold statement - wow is all I say for now.
The first one is one from the the collection Kate Moss created for Rimmel - Rimmel Kate Lasting Finish Lipsticks which I have heard so many great things about. It's not a huge range of colors available, but they are all very wearable and I decided on shade 16, which is a light and creamy coral pink that's supposed to last up to 8 hrs.
A while back I did a review of the YSL Glossy Stain which is a firm favourite of mine now, and at the time I got a few recommendations to try the L'Oréal Glamshine Stain Splash which is a High Street dupe for it. Again there aren't very many shades to choose from in this range, so I went for shade 200 Princess, which is a lively glossy coral and I'm really looking forward to seeing how it measures up against YSL.
Having indulged in a few coral shades which I'm always most naturally drawn to, I thought I would also get some autumn colors. The first two are both Bourjois Colour Boost Lip Crayons. Ever since I first tried these earlier this year I've worn the Spring & Summer shades a lot and I really like the formula combining shine and moisture and find them great to wear. When I saw the new shades of the season of course I had to get them as well. Rouge is a lovely soft and creamy red with a blue undertone that I think I'll get a lot of wear out of. The other one is more of a gamble for me - Prune, is a gorgeous deep mauve berry shade, a little darker than I usually go for, but since I'm really trying to mix it up, I'm determined to give it a go.
I haven't tried any of the lip products from 17 for a very long time, but it's another brand that has really stepped up its game this year. Based on the description this seems to be very similar to the Bourjois Lip Crayons, so I couldn't resist getting the 17 Lip Crayon in Heartbreaker, a lovely burgundy shade to compare them.
Having got quite a wide range of shades, all I was missing really was a good nude which I never seem to get right. To make it easy for myself I turned to the L'Oréal Color Riche Collection Privée. and eventually settled on Barely Peach by Julianne Moore. It's not at all what I had expected - I had almost decided to go for the Doutzen Kroes shade since we have similar colouring, but there was something about it that didn't quite click for me. When I've tested it I'll let you know if I should have stuck to the expert matching, or if I was right to follow my makeup gut.
No shopping trip is complete without a few new inspirational nail polishes and I'm proud of myself that only got two this time around - I should have used the same principle with the lip products... They are both from everybody's favourite nail polish man - uncle Barry (M), and they are actually each other's complete opposites, proof that I have a multiple nail polish personality. First we have the amazing, glimmering jewel that is the Christmas Limited Edition Glitter Paint in Tinseltown. The glitter in happy sparkly red, clear royal blue, and radiant violet was just too much for me to resist, and I'm going to have so much fun experimenting with different base shades, using this as topcoat!
The other one is the paired down, Matte Nail Paint in Vanilla, which I think makes a very sleek, stylish and strict statement. So keep an eye out and I'm sure you'll see them appearing in Manic.Monday posts in the near future!
Well that was that! I'm very excited about my new products and all I need to do now is decide what I should try out first for the first review to go up soon - any suggestions?
Let's start with the eye products! For me Bourjois has been on a real winning streak this year and produced some excellent products and as fan of the Maybelline Colour Tattoos I obviously wanted to try the Bourjois' version, Color Edition 24h Eyeshadow. Since I'm trying a few new things with my makeup this season I didn't want to be predictable and go for the usual taupes and bronzes and instead went for Khaki Cheri, which is a gorgeous warm golden bronzed green. I haven't even tried it yet, but I already love it and really hope that the wear is as great as what you get from Maybelline. I also picked up a few classical Bourjois Little Round Pot Eyeshadow to use for a quick and simple day wear, all across the lid with eyeliner. I chose the shades 16 Orange Epice, a warm golden cinnamon and 54 Marron Glace a genuine chocolate brown with some faint shimmer.
This year I'm really trying to be more seasonal with the colors I use in my makeup, introducing some berry shades and purples. The L'Oréal Colour Riche Quad is perfect for that with its four perfectly matched, tonal mauves which I think will work well with blue eyes. I have tried a few other palettes this year and while I've liked most of them, there's almost always been pigmentation issues with the lighter shades, so fingers crossed that all four will work for me.
Still on the purple theme - I also got the Rimmel Scandaleyes Shadow Stick in Paranoid Purple. I've only tried this on very quickly and a more detailed review will follow later on, but it feels very soft and should glide on without too much tear, and the purple shade certainly is a bold statement - wow is all I say for now.
This is the bit I'm slightly embarrassed about. As you may know I have recently suffered a loss of a much loved lipstick, and I can only blame grief for the ridiculous amount of lip products I managed to buy in one go. I'm clearly looking for a substitute... but in my defense I did get them in a variety of shades and types.
The first one is one from the the collection Kate Moss created for Rimmel - Rimmel Kate Lasting Finish Lipsticks which I have heard so many great things about. It's not a huge range of colors available, but they are all very wearable and I decided on shade 16, which is a light and creamy coral pink that's supposed to last up to 8 hrs.
A while back I did a review of the YSL Glossy Stain which is a firm favourite of mine now, and at the time I got a few recommendations to try the L'Oréal Glamshine Stain Splash which is a High Street dupe for it. Again there aren't very many shades to choose from in this range, so I went for shade 200 Princess, which is a lively glossy coral and I'm really looking forward to seeing how it measures up against YSL.
Having indulged in a few coral shades which I'm always most naturally drawn to, I thought I would also get some autumn colors. The first two are both Bourjois Colour Boost Lip Crayons. Ever since I first tried these earlier this year I've worn the Spring & Summer shades a lot and I really like the formula combining shine and moisture and find them great to wear. When I saw the new shades of the season of course I had to get them as well. Rouge is a lovely soft and creamy red with a blue undertone that I think I'll get a lot of wear out of. The other one is more of a gamble for me - Prune, is a gorgeous deep mauve berry shade, a little darker than I usually go for, but since I'm really trying to mix it up, I'm determined to give it a go.
I haven't tried any of the lip products from 17 for a very long time, but it's another brand that has really stepped up its game this year. Based on the description this seems to be very similar to the Bourjois Lip Crayons, so I couldn't resist getting the 17 Lip Crayon in Heartbreaker, a lovely burgundy shade to compare them.
Having got quite a wide range of shades, all I was missing really was a good nude which I never seem to get right. To make it easy for myself I turned to the L'Oréal Color Riche Collection Privée. and eventually settled on Barely Peach by Julianne Moore. It's not at all what I had expected - I had almost decided to go for the Doutzen Kroes shade since we have similar colouring, but there was something about it that didn't quite click for me. When I've tested it I'll let you know if I should have stuck to the expert matching, or if I was right to follow my makeup gut.
The other one is the paired down, Matte Nail Paint in Vanilla, which I think makes a very sleek, stylish and strict statement. So keep an eye out and I'm sure you'll see them appearing in Manic.Monday posts in the near future!
Well that was that! I'm very excited about my new products and all I need to do now is decide what I should try out first for the first review to go up soon - any suggestions?
Labels:
Barry M,
Bourjois,
Eye shadow,
L'Oréal,
Lip stick,
Lipgloss,
Nail polish,
Rimmel
Monday, 4 November 2013
Manic.Monday: Barry M Bright Purple
I don't think that anyone has missed that purple is one of the biggest makeup trends this season. But purple comes in so many different shades; we've seen some gorgeous rich plum berry colors, subtle lilac, metallics and smoky aubergine vampy shades. All gorgeous in their own way, and I thought I would stay on trend and show one of my favourite purple nail polishes - it's the shade Bright Purple from Barry M.
Barry M is one of those brands that you see mentioned by bloggers and vloggers several times a day, particularly when it comes to nail polishes, and for good reason. The brand dates back to the 1980's when it was founded to address a gap in the market for colorful and vibrant shades. And the rest is multi colored nail polish history. Since then polishaholics like myself eagerly scout the Barry M stands in Boots and Superdrug on regular basis (hrmmm - weekly actually...) for the latest polish fix and I'm sure I'm not the only one who'll turn into a kid in a candy store, with the enormous range of products available. You can find a shade in every color of the rainbow, not to mention more than 15 different glitter polishes and then we have all the amazing effect polishes like sequins, matte effect, feather effect, magnetics, textured, foils, jellies, crocs and crackles. Oh my goodness, no wonder it's impossible to walk out of a shop with just one single nail polish - I would even go as far as to say that it would be rude to do so!
It's not just about the wide range of colors, the formula is also one of the best, beating some premium brands hands down. It's a nice and dense texture, that's not to runny and it dries quickly on your nails. The brush is very average - not skinny and not wide, but it does the trick and it's of a good enough quality that it doesn't streak or leave any pesky hairs behind. With a lot of the polishes you get a nice coverage, about 80% opacity with just one coat. With the normal polishes I always go for two coats and for me that's perfect since it creates a glossy look that even without a topcoat is brilliant enough to create almost a mirror like finish which you can see in the photos (I'm wearing two coats but no topcoat for once). On me, most of the colors last about 3 days before they start to chip which I think is fairly standard (in some cases more than premium brands), and if you keep in mind that all the polishes cost between £2.99 - 4.99, this to me is amazing value.
303 Bright Purple
The shade Bright Purple is a vibrant and dynamic purple with a subtle pink hue and a yellow undertone, which creates that almost neon like glow. Amongst all the dark and gloomy shades that are so popular at the moment, this is a cheerful and radiant statement that still nods towards the purple trend. Despite being so energetic the shades is very wearable and against a mustard or ochre top it's a beautiful, creative contrast.If you are not in the UK, but you've seen enough great reviews about Barry M nail polishes that you want to give them a go, don't forget that you can buy directly from the Barry M web site, and they do ship internationally - with some exceptions, but I would definitely recommend that you check out the Barry M website.
Friday, 6 September 2013
Street Art Nails from Nails Inc
Being a polishaholic these days can be tough. With all the high street shops filled with gorgeous shades and different effect polishes they are enabling me. I am well and truly off the infamous polish wagon. One of the latest crazes is all the different topcoats - ultra shiny, matte, moon candy style, confetti, and of course the good old classic: the glitter coat. And seriously - who doesn't like a little bit of sparkle?
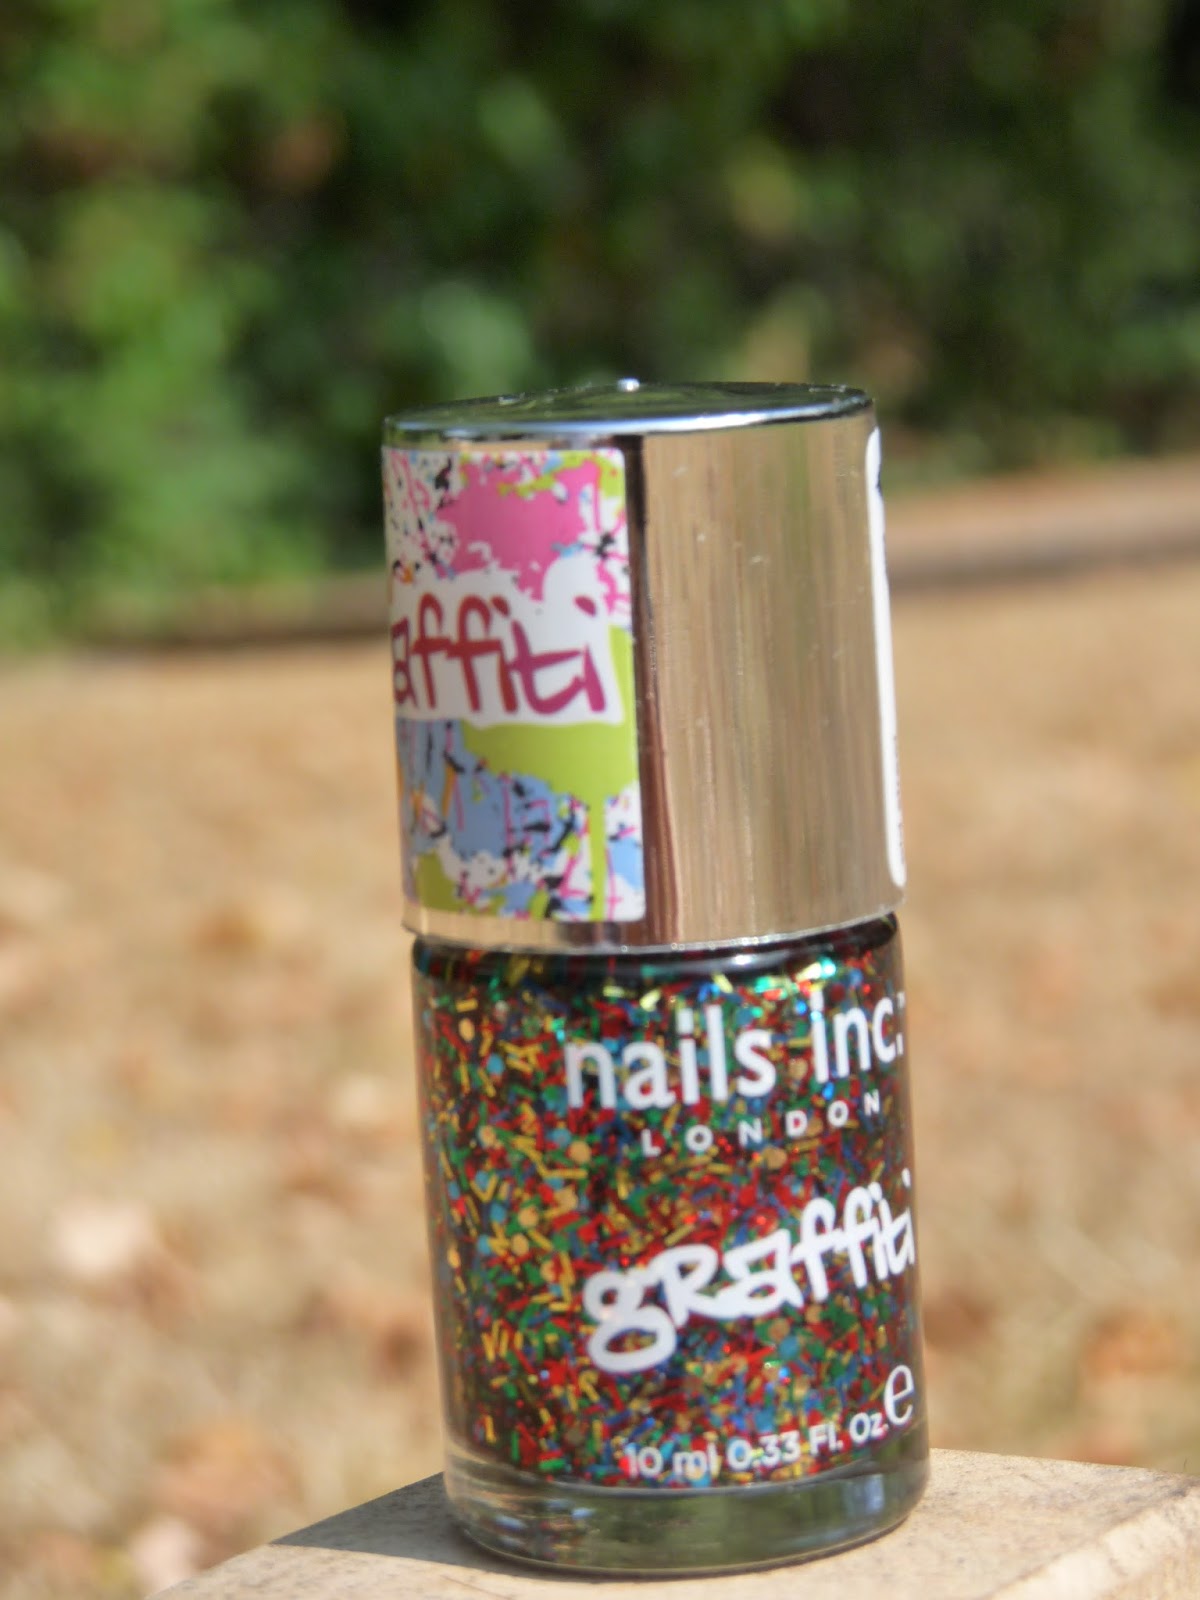
I had had my eye on Nails Inc Old Street Graffiti and shown remarkable restraint for a long time, before I finally caved in. It's a clear lacquer scattered with whimsical, asymmetric and multi coloured glitters in different textures that you use as a top coat over your chosen colour.
The first time I saw this lacquer it was worn over a white colour and I thought - WOW that's pretty cool. As with all glitter polishes no two nails will look the same, and some days the final look turns out better than others (as you can see in the photos) - that's just the way it goes. This lacquer is quite thick - almost gloopy in its consistency and it's also absolutely packed with glitter. However that does make it a bit tricky to work with. Even if it's supposed to be a hap hazard look, there still has to be some even distribution of the glitter across the nail I think - so you may need to put on two or more coats, and still do some touch ups here and there to spread the glitter shapes.
I had had my eye on Nails Inc Old Street Graffiti and shown remarkable restraint for a long time, before I finally caved in. It's a clear lacquer scattered with whimsical, asymmetric and multi coloured glitters in different textures that you use as a top coat over your chosen colour.
The first time I saw this lacquer it was worn over a white colour and I thought - WOW that's pretty cool. As with all glitter polishes no two nails will look the same, and some days the final look turns out better than others (as you can see in the photos) - that's just the way it goes. This lacquer is quite thick - almost gloopy in its consistency and it's also absolutely packed with glitter. However that does make it a bit tricky to work with. Even if it's supposed to be a hap hazard look, there still has to be some even distribution of the glitter across the nail I think - so you may need to put on two or more coats, and still do some touch ups here and there to spread the glitter shapes.
on Barry M Nail Paint - 66 Matt White
on Rimmel Nail Polish - 058 Lemon Drop
on Barry M Nail Paint - 47 Black
I've tried this top coat with different colour combinations and I've also seen it on a nude nail, so really the possibilities are endless. Personally I still think it works best on a white shade or even a black.
As much as I like the graffiti effect it's got to be said that it does come with a
couple of warnings. You may find that the glitters catch your clothes, or anything you touch, so be careful if you're wearing delicate lace or anything else that the glitters can pull. Also it is definitely long lasting - in fact it's a complete NIGHTMARE to take off. Even with the strongest, most horrible noxious acetone you can find, you'll have to spend a good few minutes on each fingertip, so when you apply it prepare yourself for wearing street chic for quite a while.
The graffiti lacquers may not be for everyone since it does have an edge - both style wise and literally, but I think it's fun to mix it up a little. Imagine wearing this with a classic LBD - very fashion forward!!!
Tuesday, 13 August 2013
The coral edition
Another product range that Benefit is famous for is their blushers and bronzers, and Coralista has been a fave of mine for a long time. I've never been very good with lip and cheek tints but when I got the Chachatint as a freebie a while back, this was an opportunity to try something completely new. The reason I'd never tried these multi tasking products is that I'd always thought it would be difficult to work with the liquid, getting it all over the place and blending it etc. But what do you know - I was positively surprised! Anyone can see that the colour is a beautiful mango coral that works perfectly with tanned skin, but I had not expected the tint to be so easy to work with. It's better to take just a tiny bit and build it up if you need to, rather than overdoing it and then having to correct - ruining any foundation, but it's really easy to blend although you have to work quickly before it sets and turns into a surprisingly matte finish. Personally I'm not sure about wearing it on my lips at the same time, but if you're packing light for a holiday trip, then why not.
I use very little eye makeup in the summer and tend to only use one shade that really emphasizes my blue eyes, and for me a golden, rusty peach or corally orange like MAC Eye shadow in Rule is all I need. I'm fairly new to MAC eye shadows so don't have a lot to compare with, but this one is very pigmented - you barely need to touch it with your brush and therfore you don't need a lot of it. You can either wear it as a very bold and vibrant statement, or blend it well for a matte subtle effect. I'm very impressed with the formula and will get some other colours as well, to play with this autumn.
One of the best coral shade lipsticks I've ever found is Rimmel Moisture Renewal Lipstick in 600 Soft Coral. The formula apparently consists of different moisturisers and vitamins to really hydrate the lips, giving them a well cared for, plump look. This is all great and it does make the lipstick pleasant to wear and longlasting, but when I bought this it was purely for the colour! It's such a lovely, soft and natural coral that adds radiance to you lips, and it's perfect for a delicate, everyday look.
Swatches from left to right
Rimmel Moisture Renew Lipstick - 600 Soft Coral
MAC Eyeshadow - Rule
Benefit Chachatint
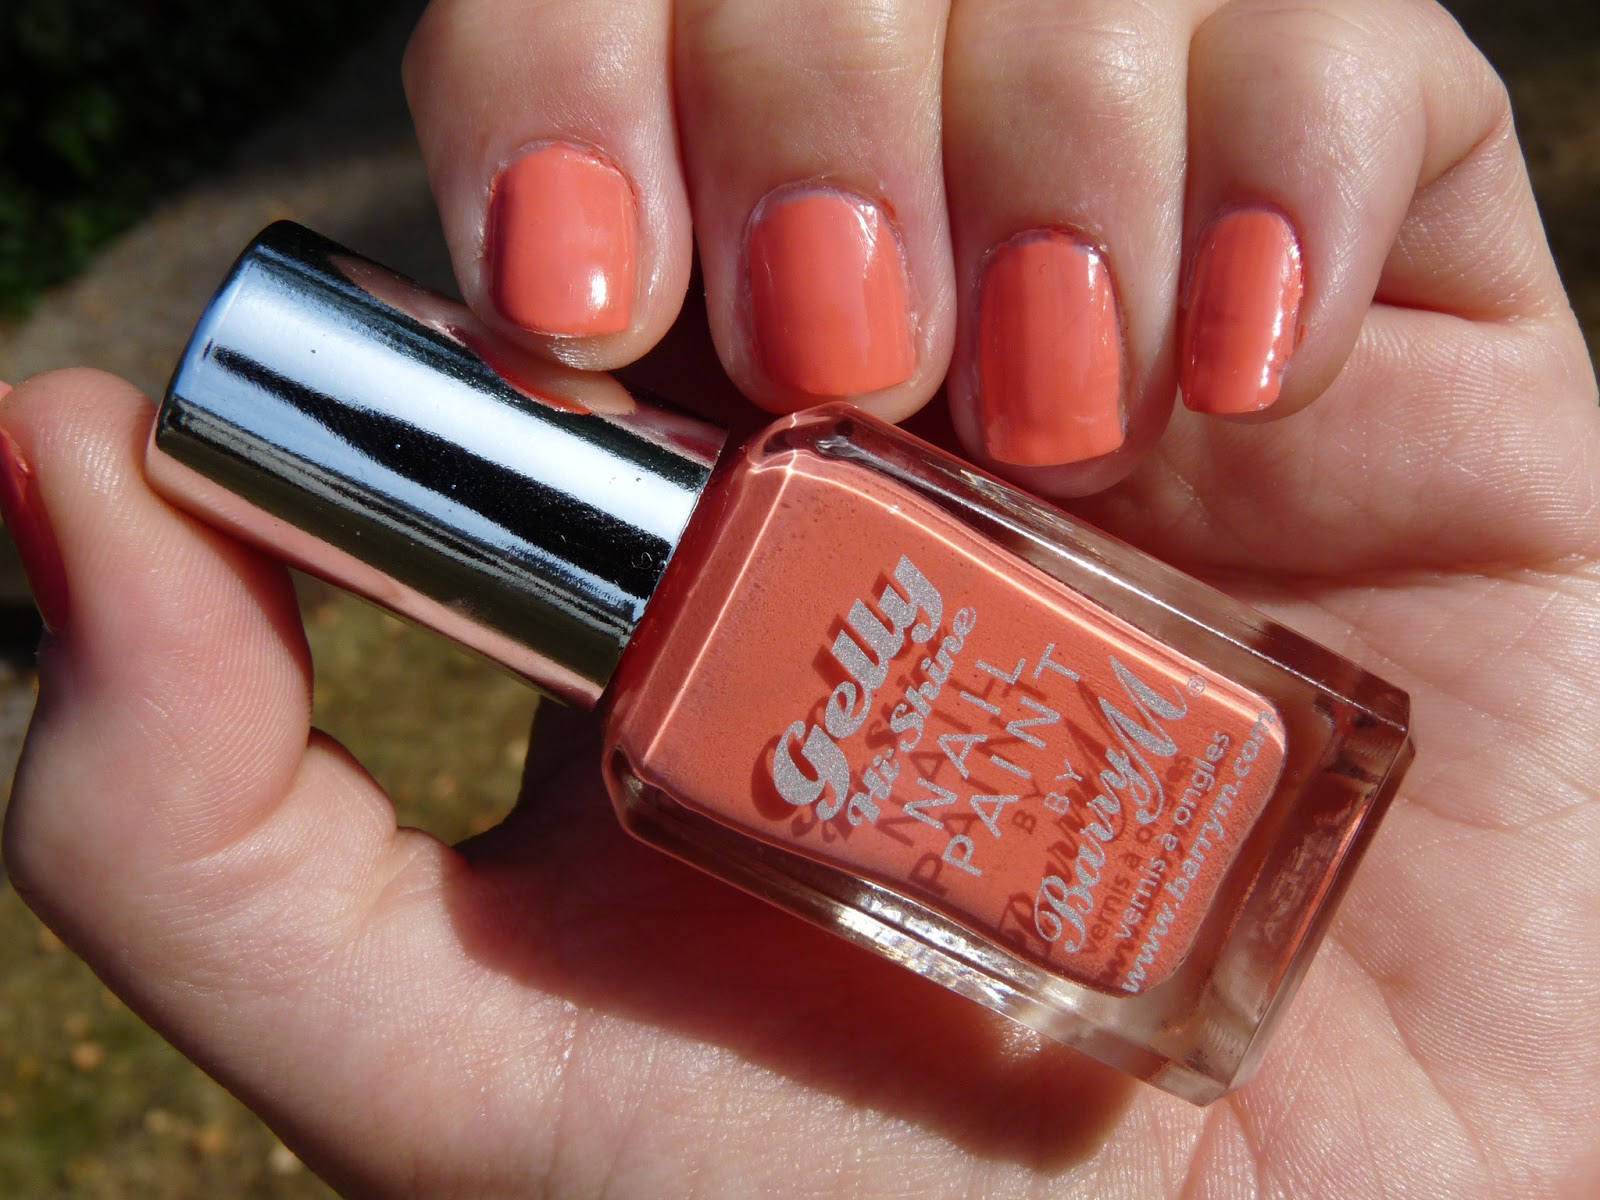
And off course we could trust good old Barry - the King of Nail polishes to come up with a gorgeous, absolute coral shade for the spring and summer collection of the Gelly Nail Paint (Papaya). By now I probably don't even have to tell you about these fabulous Gelly High Shine colours, but I will anyway.
Barry M Gelly Nail Paint - Papaya
With the gelly paints, there's no need to go to the salon and spend a fortune a gel mani when you can get more or less the same effect at home. These nail paints have an incredible high shine finish and with a lot of the colours you don't need more than one coat. However for the lighter shades like Papaya and Dragon fruit, I would recommend that you use two coats for that deliciously ice creamy opaque and glossy finish. These really are amazing and if you haven't already tried any of the gelly paints, you should put one at the top of your beauty shopping list for August.
As we move into autumn, other colours will dominate the fashion and beauty scene, but I'm so sure that next summer we'll see the return of coral again, I might even bet on it!
Labels:
Barry M,
Benefit,
Blusher,
Eye shadow,
Fragrance,
Lip stick,
MAC,
Nail polish,
Perfume
Wednesday, 24 July 2013
July Favourites
The past few weeks we've had a heatwave in the UK with temperatures above 30C, which doesn't happen very often - in fact they say that the last time was in 2006, so about time we crank up the temperature I think! With the heat and the sun, my guiding principles have been - fuss free and low maintenance. Forget about foundation and full coverage make up - for me this month has been all about keeping it minimal with the help of some key items.
I've talked about Caudalie's Divine Oil in a previous post - Sweltering summer day essentials, but since I've used it every day I want to give it a special mention again. This dry oil is a mix of grape, hibiscus, sesame and argan and not only does it sound good enough to eat, but it gives a deeply moisturizing feeling. It has a lovely aromatic scent but it's subtle enough for you to easily layer it with any EdT or perfume. It really brings out your tan, giving your skin a lovely golden sheen to keep your look naturally fresh and summery.
I am a complete magpie - I am drawn to shiny, sparkly things and when it comes to beauty products the Collection 2000 Lasting Perfection Concealer
is probably one of the the most unglamorous items I've ever seen.
However, if you can see past that unattractive packaging (and you MUST),
you'll find hidden inside the most amazing concealer ever. It claims to
stay on for 16 hrs, and while I haven't exactly timed it I can say for
sure that it gives amazing long lasting and matte coverage (even in temperatures of 30C), using only
the tiniest bit of product. While other products may look
prettier in your make up bag, in my view there's no need to
get those more expensive labels when you can pick this up for a fraction of the cost.
A trusted item for minimal summer day makeup is the bronzer, and the one I've been using the most is my MUA Bronzer. I quite like the MUA product range, although it can be a bit of a hit or miss. The bronzer is definitely a hit, and it's also another bargain buy (£1)! The packaging is basic, helping to keep the price down but the pigmentation is good and gives a natural glow. The bronzer is easy to apply and build up, without it becoming thick as a layer cake. You can pick up MUA at your local Superdrug, or on the MUA web page where the bronzer is currently on sale for an unbelievable £0.50. If you haven't tried this label before - go and get a bronzer, or maybe even two - at that price, how can you afford not to?!
I've been wearing the Bourjois Colour Boost Lip Crayon that I mentioned in my Lip Service post, every time I've been out. This is an amazingly smooth and long lasting lip crayon with SPF, that gives a high shine, sleek finish and moisturises at the same time. So much goodness is packed into this glossy lip product! My favourite shade is Peach on the beach - a gorgeous pale pinky coral that works sooo well with a tan.
My look may have been minimal these summer days but there's no need for it to be boring, so of course I've added pops of colour with Barry M Gelly Nail Paint. Everyone is raving about the gelly fomulas, and for a very good reason - FACT: THEY ARE GREAT! You can definitely use just one coat of this shade, although personally I prefer it to be very opaque so in the photos I've used 2 coats as well as a high shine top coat.
I've been loving the shade Guava, which is a bright and rich, gorgeous glossy turqoise with a warm undertone of yellow, that makes me think of warm Caribbean waters. This is perfect for sunny days, and if you're not lucky enough to go away on holiday this summer, at least you can get some tropical colour on your nails for that holiday feel!
I've talked about Caudalie's Divine Oil in a previous post - Sweltering summer day essentials, but since I've used it every day I want to give it a special mention again. This dry oil is a mix of grape, hibiscus, sesame and argan and not only does it sound good enough to eat, but it gives a deeply moisturizing feeling. It has a lovely aromatic scent but it's subtle enough for you to easily layer it with any EdT or perfume. It really brings out your tan, giving your skin a lovely golden sheen to keep your look naturally fresh and summery.
A trusted item for minimal summer day makeup is the bronzer, and the one I've been using the most is my MUA Bronzer. I quite like the MUA product range, although it can be a bit of a hit or miss. The bronzer is definitely a hit, and it's also another bargain buy (£1)! The packaging is basic, helping to keep the price down but the pigmentation is good and gives a natural glow. The bronzer is easy to apply and build up, without it becoming thick as a layer cake. You can pick up MUA at your local Superdrug, or on the MUA web page where the bronzer is currently on sale for an unbelievable £0.50. If you haven't tried this label before - go and get a bronzer, or maybe even two - at that price, how can you afford not to?!
Swatches from left to right
Bourjois Colour Boost Lip Crayon - Peach on the beach
MUA Bronzer - Shade 1
I've been wearing the Bourjois Colour Boost Lip Crayon that I mentioned in my Lip Service post, every time I've been out. This is an amazingly smooth and long lasting lip crayon with SPF, that gives a high shine, sleek finish and moisturises at the same time. So much goodness is packed into this glossy lip product! My favourite shade is Peach on the beach - a gorgeous pale pinky coral that works sooo well with a tan.
Barry M Gelly Nail Paint - Guava
I've been loving the shade Guava, which is a bright and rich, gorgeous glossy turqoise with a warm undertone of yellow, that makes me think of warm Caribbean waters. This is perfect for sunny days, and if you're not lucky enough to go away on holiday this summer, at least you can get some tropical colour on your nails for that holiday feel!
Labels:
Barry M,
Body Oil,
Bourjois,
Bronzer,
Caudalie,
Collection 2000,
Concealer,
Lip stick,
MUA,
Nail polish
Friday, 19 July 2013
The pink edition
The colour pink is apparently a combination of violet and red and it's supposed to signify unconditional love and nurturing. It is also of course associated with the feminine and girly, but don't mistake any of those for ditziness; just look at Pink - a strong independent woman!
This spring and summer we've seen a range of pink shades from shimmery and sugary, ice cream sweet tints to more punchy, rosy and opaque versions and below are some of my picks from this pink trend.
If diamonds are a girl's best friend, then dry shampoo comes in second place. I don't think that any further introductions are necessary - we all recognize them and reach for them, for those in between days to freshen up our locks and add some more body. I've mentioned before that I love the Batiste range, and seen here is the scent Blush floral and fresh, in a pretty flowery bottle.
Viktor & Rolf Flowerbomb La Vie en Rose EdT is a summer edition of Flowerbomb, and it's fresher and fruitier than the original (you can see the full description of notes in the link for the EdT). I can clearly pick out the combination of rose and green tea which is quite prominent (reminding me of Elizabeth Arden) and it's an unexpectedly fresh but floral scentsation. Even though it is a lighter version than the original, on scorching summer days for me personally - this fragrance is too much. As it contains patchouli, it develops far too heady for me and I prefer to save it for the slightly cooler spring and summer days when you can really pick up on the fruitier and faint citrusy notes.
Rimmel is in general a great purse friendly brand, but in my opinion their best product release in the last year or so is definitely the Apocalips Lip Lacquers. The pigmentation in these goodies is absolutely fantastic - intense but at the same time shiny and very sleek. The applicator is a dream to work with and you get so much colour with it. That's why you do have to be careful when you apply, since the intense colour means that it's not always easy to correct any smudging, particularly not with the some of the deeper red shades. Celestial is a gorgeous rich warm pink shade which is suitable for any season.
Rimmel Apocalips in Celestial
Swatches from left to right
Rimmel Apocalips - Celestial
Maybelline Colour Tattoo 24 HR - Pink Gold
I've also mentioned the Maybelline Colour Tattoo 24 HR in another blog and this eye shadow is far from a new product range, but because of it's staying power it's great for summer and deserves to be mentioned often. Pink Gold is a lovely cool shimmery pink which is great either as a base or is nice on its own for a subtle, fresh lick of colour - very fuss free.
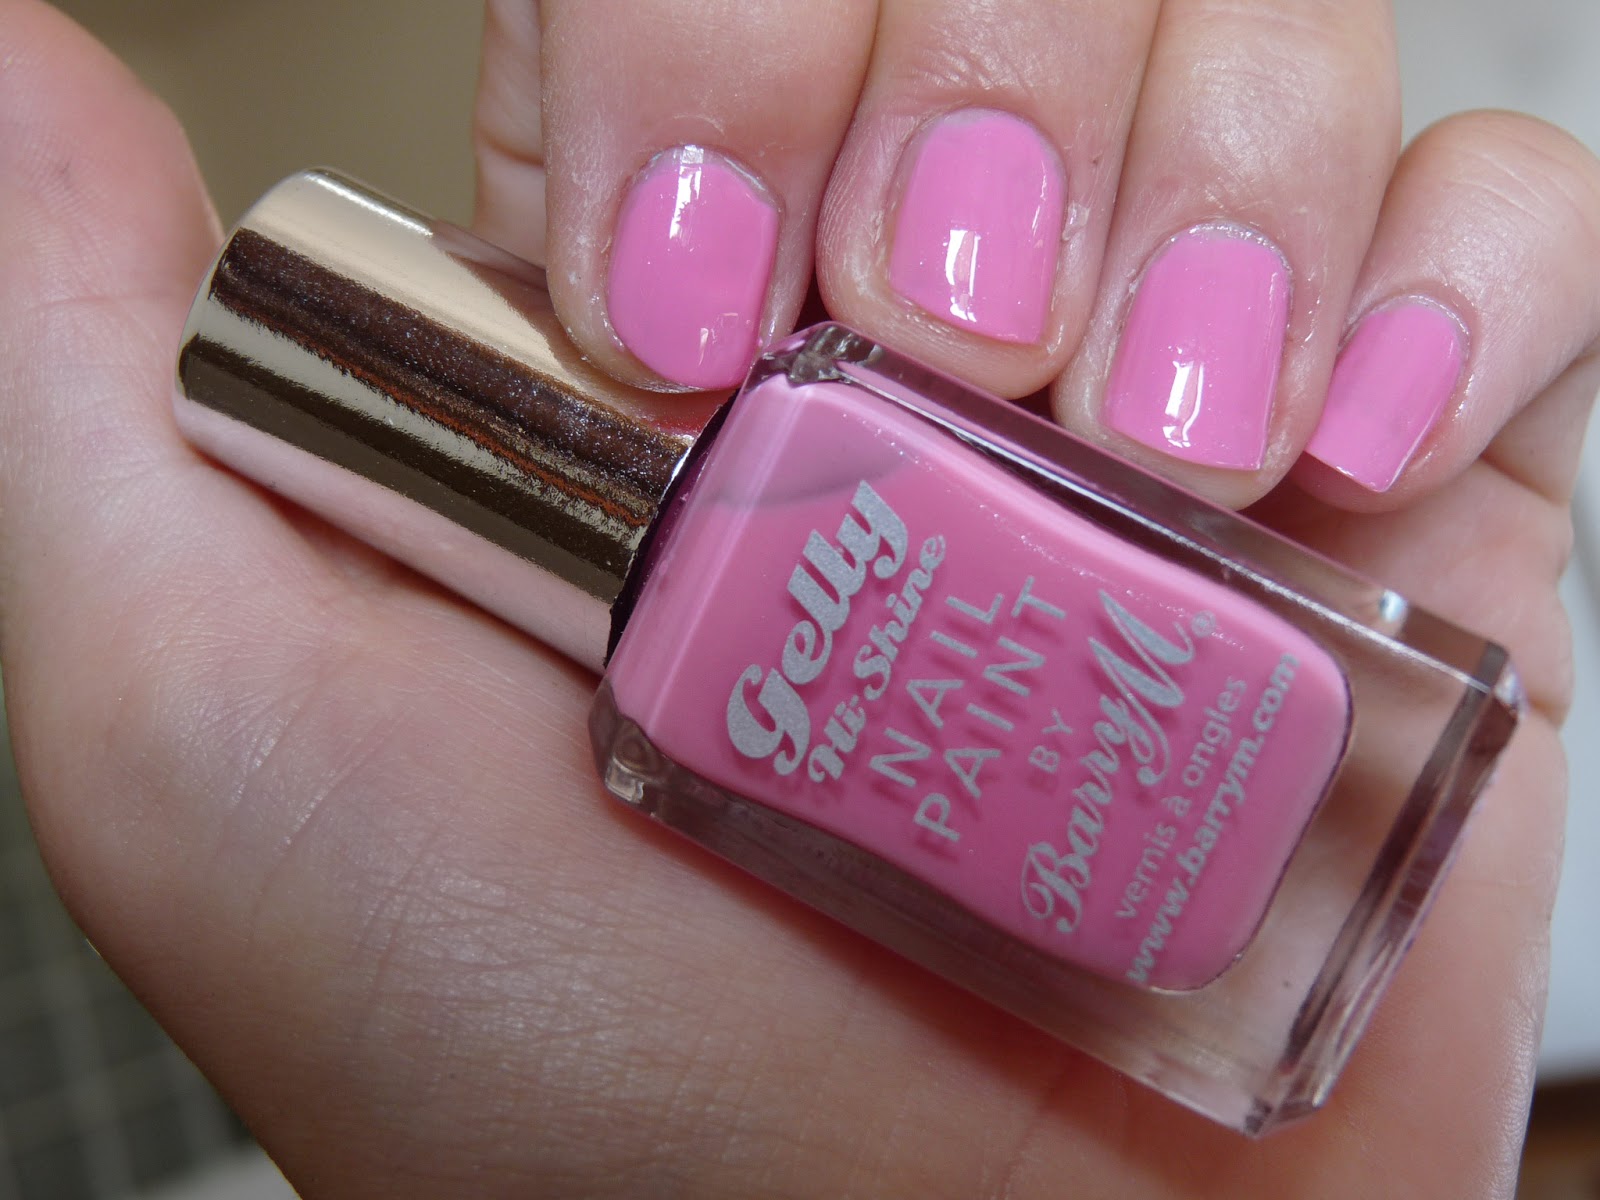
My last item in this pink collection is the Barry M Gelly Nail Paint, which is an amazing formula as made for on the go application. With most of the colours you really don't need more than one layer, and even better you don't need a topcoat since the gel effect already gives you all the high shine you need. For this particular shade however - Dragon fruit, I would recommend using 2 layers for a solid opaque finish. Dragon fruit is an old fashioned, punchy barbie pink with some blue undertones that I personally think works best in the summertime.
Barry M Gelly Paint - 303 Dragon fruit
Regardless if you prefer the cooler or warmer shades of this edition's colour there's a product and a shade to suit everyone, so we can all be pretty in pink.
Thursday, 11 July 2013
The Bronze Age
There is something special about the sun. Not just the fact that it cheers me up after weeks and weeks of drab, horrible weather, but it also energizes and melts away those sharp edges around my person that have formed over a looooong winter with no end - I think I'm sun dependent to feel harmonious and come into my own. There is of course those pesky free radicals and UV rays to think about, but with some sun screen we can all enjoy the sun responsibly..... I feel like the cautionary voice in the drinks adverts.
Regardless of how much sun you want to expose yourself to, most of us still want and even CRAVE that bronzed, golden, healthy look. And there are plenty of products to help bring out whatever tan you have, or want to pretend that you have - so here are some of my favourites this year.
I'm not a fan of self tanning, probably because I'm rubbish at it and the only thing worse than a pasty green tint of winter is the streaky self tan Zebra look (at least on humans) - but Caudalie's Divine Legs has somehow mysteriously made its way into my summer stash, thanks to Him indoors. I now might actually be a convert to self tanning - this is an excellent product! First of all it doesn't have that distinct horribly fake self tanning smell like many other brands, it doesn't stain every single piece of clothing, it goes on without streaks or patches and it has an amazing glowing finish as if you had massaged oil into your skin as well. I know it sounds too good to be true - but at least for me this product means the end of pale pale paaaaaaaaaale winter skin, yaay! I don't care that it's £26 - when it's finished, I'm getting another one.
Bronzing powder is great for sculpting and contouring, but at this time of year I also use it as a blusher. With the Bourjois Bronzing Powder, £6.99 you get a great colour and it's easy to work with. Not only that - when you open the packaging it looks and smells like a chocolate bar. Aaah, completely guilt free pleasure! Just be careful not to apply too much; bronzed = good, orange = tangoed.
In the summer I don't usually bother with eyeshadow since it's bound to smudge, but the Maybelline Colour Tattoo 24 HR, £4.99 is an exception. The range of colours is amazing and I've already snapped up a fabulous cranberry for autumn because of it's fantastic staying power. It's the easiest thing in the world to apply, using your fingers all over the lid and once it's set - it's there for the rest of the day without any creasing. I don't know how they've managed to squeeze so much goodness into a little pot, but I'm well impressed and can't wait go get some more shades.
To add some definition, the Barry M Eyeliners are soft, easy to blend and full of pigmentation, and for £2.99, they're an absolute bargain.
Finish it all off with a lick of No 7 BB Lips Beauty Balm, £8.50 for a subtle fresh sheen. I'm going with an irresistible pale glossy pink that works perfectly with a bronzed look.
Regardless of how much sun you want to expose yourself to, most of us still want and even CRAVE that bronzed, golden, healthy look. And there are plenty of products to help bring out whatever tan you have, or want to pretend that you have - so here are some of my favourites this year.
I'm not a fan of self tanning, probably because I'm rubbish at it and the only thing worse than a pasty green tint of winter is the streaky self tan Zebra look (at least on humans) - but Caudalie's Divine Legs has somehow mysteriously made its way into my summer stash, thanks to Him indoors. I now might actually be a convert to self tanning - this is an excellent product! First of all it doesn't have that distinct horribly fake self tanning smell like many other brands, it doesn't stain every single piece of clothing, it goes on without streaks or patches and it has an amazing glowing finish as if you had massaged oil into your skin as well. I know it sounds too good to be true - but at least for me this product means the end of pale pale paaaaaaaaaale winter skin, yaay! I don't care that it's £26 - when it's finished, I'm getting another one.
Bronzing powder is great for sculpting and contouring, but at this time of year I also use it as a blusher. With the Bourjois Bronzing Powder, £6.99 you get a great colour and it's easy to work with. Not only that - when you open the packaging it looks and smells like a chocolate bar. Aaah, completely guilt free pleasure! Just be careful not to apply too much; bronzed = good, orange = tangoed.
In the summer I don't usually bother with eyeshadow since it's bound to smudge, but the Maybelline Colour Tattoo 24 HR, £4.99 is an exception. The range of colours is amazing and I've already snapped up a fabulous cranberry for autumn because of it's fantastic staying power. It's the easiest thing in the world to apply, using your fingers all over the lid and once it's set - it's there for the rest of the day without any creasing. I don't know how they've managed to squeeze so much goodness into a little pot, but I'm well impressed and can't wait go get some more shades.
To add some definition, the Barry M Eyeliners are soft, easy to blend and full of pigmentation, and for £2.99, they're an absolute bargain.
Finish it all off with a lick of No 7 BB Lips Beauty Balm, £8.50 for a subtle fresh sheen. I'm going with an irresistible pale glossy pink that works perfectly with a bronzed look.
Swatches of the products (from left to right):
Barry M Eyeliner - 28 Bronze
No 7 BB Lips Beauty Balm - Blink Pink
Barry M Eyeliner - 29 Copper
Maybelline Colour Tattoo 24 HR - 35 On and on bronze
Bourjois Bronzing Powder - 52 Peaux Mates/halées
Labels:
Barry M,
Bourjois,
Bronzer,
Caudalie,
Eye liner,
Eye shadow,
Lipgloss,
Maybelline,
No 7,
Self tan
Wednesday, 10 July 2013
Nailing it in ombre
I know that we're in the middle of summer, and on top of it all we're enjoying a fantastic heat wave (yeeeaaay FINALLY) - but after having shown off my fingertips in every delectable pastel colour you can imagine, I thought I would mix it up a little.
We've seen ombre for hair and you could almost say that ombre is the new black, and even by The New Black when it comes to ombre nails. I know the adorable 5 colour sets are readily available in the US, however I haven't seen them or anything similar here in the UK.
But since I was feeling a bit creative I rummaged around in my stashes of nail polish and came up with a DIY version, which is very easy to do - just try and get 5 tonal shades in whatever colour you prefer that gives a nice gradient effect. And since life is far too short for only one colour on your nails, wearing ombre gives you an opportunity to go 5 in 1.
Admittedly the colours I've gone for may be more suitable for autumn, but as much as I adore pastel nails it was time for a change.
Here are the nail polishes used from left to right (using at least 2 layers of each):
We've seen ombre for hair and you could almost say that ombre is the new black, and even by The New Black when it comes to ombre nails. I know the adorable 5 colour sets are readily available in the US, however I haven't seen them or anything similar here in the UK.
But since I was feeling a bit creative I rummaged around in my stashes of nail polish and came up with a DIY version, which is very easy to do - just try and get 5 tonal shades in whatever colour you prefer that gives a nice gradient effect. And since life is far too short for only one colour on your nails, wearing ombre gives you an opportunity to go 5 in 1.
Admittedly the colours I've gone for may be more suitable for autumn, but as much as I adore pastel nails it was time for a change.
Here are the nail polishes used from left to right (using at least 2 layers of each):
OPI - Suzi says da!
YSL - 21 Taupe Retro
Barry M - 310 Mushroom
Essie - Jazz
OPI - Sweet heart
Let there be Nail creativity!
Subscribe to:
Posts (Atom)